|
There are three locations where you can change the look of
Windows XP to the Windows 9x Classic view. The
first is the general look and feel of the desktop.
The second is the Start Menu. And the
third is the Control Panel.
ps: clicking an image will get you the full size
version.
Appearance and Themes
Go to Start button -> Control Panel -> Appearance
and Themes -> Display.
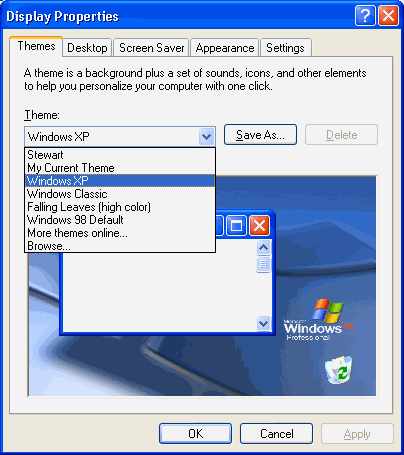
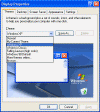
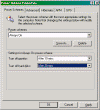
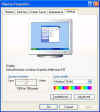
Selecting Display from Appearance and Themes will open the Display
Properties page. Users who have upgraded from Windows
9x and Windows 2000 will find little has changed. One tab
was added, Themes, and the Web
tab has been removed. The Background tab has been
renamed the Desktop tab. The
Effects tab has now been
moved to the Appearance
tab. The final tab is Settings.
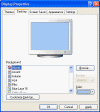
The Display Properties page is where you can
control the way your Windows appears. You can select a
theme (The default Display setting is with the Windows XP
theme selected.) You can setup a screen saver, adjust the
power settings for your monitor and system standby, change
the colors of the windows and text, change the fonts to be
used for windows, buttons, icon text, etc. (If you are not
using a theme.) You can also change screen resolution and
color quality.
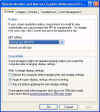
Themes
The important point that needs to be made is that
themes have little flexibility. Some items can be changed
but not all. Which part? Don't know.
One of the choices under themes is Windows Classic. Windows Classic isn't really a theme and it's
only here to make it easier for you to find. Select Windows Classic from the Windows
and buttons drop-down list. You can also
select the Windows Classic look from the Appearance
tab.
Changing the look and feel of your desktop is no
different than when you where in Windows 98 or Windows
2000. OK it is a little different. When you go to the
properties for the desktop you will see a different set of
tabs. They are: Themes (new),
Desktop (previously named
the Background tab,) Screen
Saver, Appearance,
and Settings.
 |
| Themes |
The default theme is Windows XP. What else would it be? You can change some parts of
this theme but not all. What part of a theme that can be
changed is unknown to Windows Assistance. I use the change
it and see what happens method. It takes longer but it
seems to work. I have changed the background to none and
applied a color of my choice. This was done from the Desktop
tab.
When you're done customizing your user interface click
the Save As button and save your settings using a
unique name.
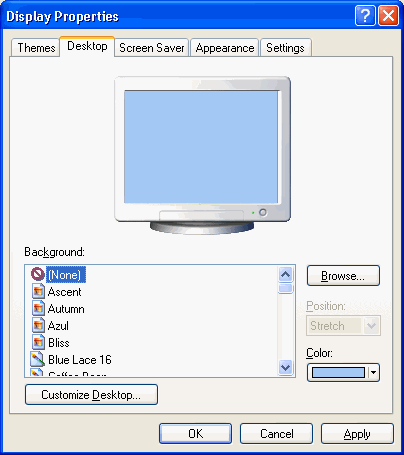
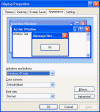
Desktop
 |
 |
 |
| Desktop
Tab |
Customize
Desktop |
Change
Icon |
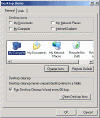
From the Desktop tab you can change the Background of
your desktop. Either use a Background file or
select a Color. You can also Browse you computer to
fine a background file. Position allows you to Stretch,
Tile or Center a Background file.
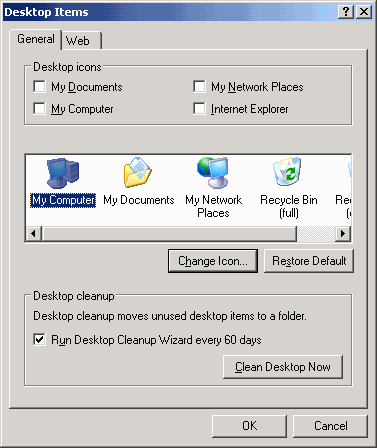
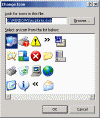
From the Customize
Desktop button you can add/remove certain
shortcuts from the desktop; change
icons for specific shortcuts; and enable the Desktop
Cleanup Wizard
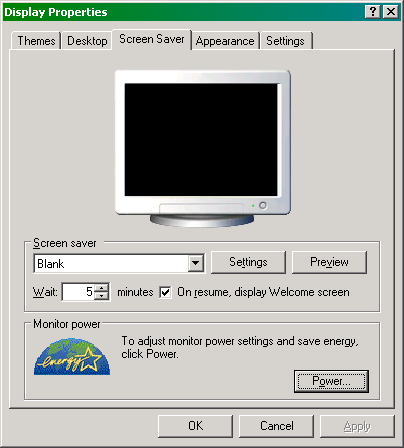
Screen Saver
One new option from the Screen Saver tab for Windows 9x
users is the ability to display the Welcome screen when
you resume (Needed Active Desktop in Windows 9X and who
knew how to do this or ever wanted to.) This means that
the user must provide their password before getting back
into the system. What Windows Assistance hasn't figured
out is a way activate Screen Saver through some
command. We would like that.
 |
 |
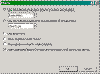
| Screen
Saver |
Power
Options |
The problem with Screen Saver is that it uses
resources. Screen Saver doesn't save anything. What
it will do is pound the heck out of your disk drive when
it is in Screen Saver mode. Watch the disk light on
your computer. It also slightly decreases processing power
for background operations. So, in general, Windows
Assistance doesn't use Screen Savers. That said
read how Windows Assistance has decided to use Screen
Saver for local security.
Screen Saver as Security
Windows Assistance uses Screen Saver to protect the
system from illegal access and to save power.
To do this Windows Assistance uses blank Screen Saver
and enables On resume, enable Welcome Screen.
Then we went to Power Options->Advanced tab
and checked Prompt for password when computer resumes
from standby.
These two options will put the system at the Welcome
screen whenever someone wakes up the system.
The final trick is to use the Windows key + L (Switch
user or lock computer) to put the system at the Welcome
screen whenever you leave the system but you are not ready
to sign-off.
Using these three schemes you can pretty much protect
your computer when you leave it.
Now if we can only get users to apply good
passwords.
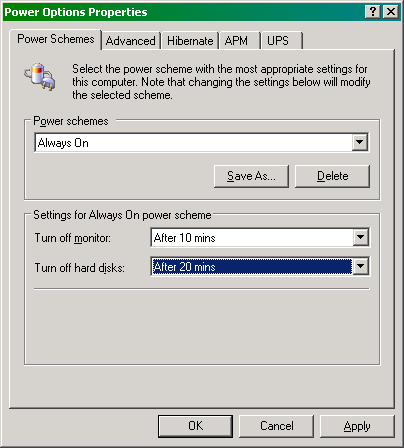
Power
Power Schemes tab allows you select from Always
On, Home/Office Desk, and Portable/Laptop. Now set the
delay time. Even with Always On the you can set
delays.
You have more options. Note under the Advanced
tab you can prompt for Password when the computer
resumes from standby.
note: You need Administrative rights in order to
change any of the Power Options.
Appearance
 |
 |
 |
| Appearance |
Effects |
Advanced
Appearance |
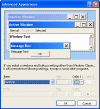
The Appearance tab has been changed. To make
detailed changes to the appearance you need to click the Advanced
button. If you want the Windows Classic style then you
need to select it from the Windows and buttons drop-down
list. Then go to the Advanced
page to customize your user interface.
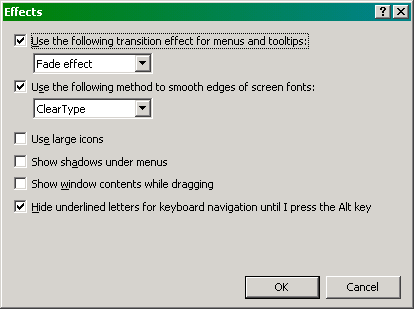
Effects
The Effects properties page allows you to
enable/disable several visual effects. this is where you
can enable Clear Type. Windows Assistance saw a
degradation of font clarity when Clear Type was
enabled.
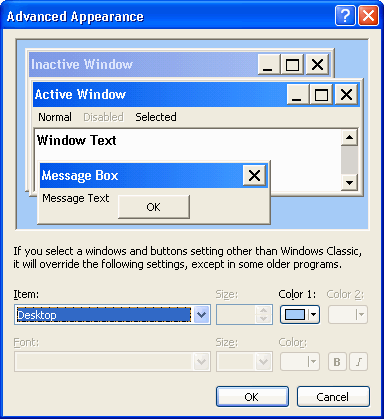
Advanced Appearance
Note that the Advanced Appearance tab warns that
some items can't be changed unless you are using the
Windows Classic theme(?). If you are using the Windows XP
theme you can make the changes and they will appear on the
Advanced Appearance page but not on the desktop.
Whatever.
note: Windows Classic is not a theme. It is the
basic User Interface (UI.) All those themes sit on top of
the Basic Windows User Interface.
Fonts: If the fonts are to small for you then
this is where you can change the font size. There're
several items that have a font listed. From the Items drop-down list
select each item and make your font changes if a font is
associated with the item.
When you are through go to the Themes
tab and save your settings using the Save As button.
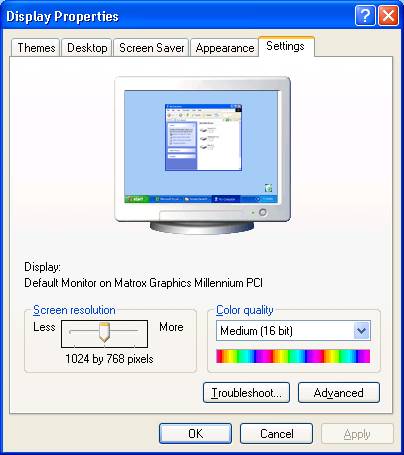
Settings
 |
 |
| Settings |
Advanced
Settings |
From the Settings tab the user can select the Screen
Resolution, and Color Quality. From the Advanced
button the user can update information for the Video
controller and the Monitor.
Each user can change the Screen Resolution and Color
Quality to fit their needs. If changes need to be made from
the Advanced tab the user must have Administrator rights.
Settings Advanced
From the Settings Advanced page a user can
set the display DPI (Dots per Inch.) The default is 96dpi.
If you have trouble viewing information on the screen this
setting can be changed. If it's just the fonts that are
giving you problems then go to the Appearance tab->Advanced
button and change the font settings.
|